Monday, October 18, 2010

Bison's custom 'ukulele

Model# UMCTH10   Serial # K3BMT03


Curly Koa, top, back and sides. Neck is Sapele Mohagany and fret board is Bubinga Rosewood. This is going to be a 14th fret to the body, high G tenor 'ukulele with Paua Abalone rosette inlay and marker dots.

In addition, to make this 'ukulele stage worthy, it will have a pickup mounted under the saddle.

This koa is curly.....

Friday, October 8, 2010

First, decide how to use the wood...

After looking at the raw 'uke wood peices, it's important to determine how to orient them for the overall look of the 'ukulele. For example, the back. To decide what will be the top, bottom, inside, and show side(outside), place a template over the unglued pieces to imagine how it will look.


 Do the same with the soundboard.

Jointing the plates.....

before gluing the two bookmatched pieces for the back and soundboard, the edges need to be sanded flat and square so the create a good seal down the middle. To do this, a fence is used to sand and square the edge that will be glued together.
Sand until you cannot see any light through the joint when you squeeze the two pieces together. If there is any light seen on either edge of the pieces when they are connected, they will rock apart, literally.
This jig is used to glue the pieces together.
Always dry fit before gluing, and off set the pieces so the middle can be found more easily after they are glued together.

Marking the plates......

After the back and side pieces are glued together, the template outline is traces on the wood as close to how the finished 'uke will look, then a 1/4" line is drawn outside of that.   


The outer line wil be the line that is cut for a rough shape of the 'uke.


Spanish neck headstock construction.....

The 'uke headstock of this neck will have a 15 degree angle. (note: Traditionally classical guitars have a headstock angle of around 13 degrees. Since the tuners of this 'uke will protrude through the top inside of through the middle like a classical guitar, the 15 degree angle will compensate for the extra distance created by placing tuners from the bottom through to the top, creating a 13 degree angle.)

A 15 degree jig is used to ensure an acurate angle for this presice cut.


After the neck angel is cut, the pieces that were cut need to be sanded to ensure they are square and flat.
Dry fit the two pieces together before gluing. Clamp down to a flat surface so it doesn't slide around when gluing the pieces togther. (note: newspaper is placed under the pieces being glued so the glue squeeze out doesn't make the 'uke one with the work surface.)

Spanish neck heel construction.....

Since this is a "Spanish Style" neck construction, the sides of the 'uke will be slotted in the neck. The difference between this style and the popular "glued on" or "bolted on" method, is that the heel is less bulky. Theorectially, the connection between the body and neck should be structually stronger then alternative methods. Historically, this is how classical guitars are built.


First, glue blocks together that will create the heel and slot joint for the 'uke sides.
When clamping the block together, to make sure they don't slide, they are placed along a fence and clamped  down to a flat surface. 

Step one done......

These pieces are ready for the next step, which is to shape, glue, and scallop the braces, tone bars, and inlay the abalone around the soundhole. Then prep the neck before it is attached to the soundboard.
Please check back for the progress of "The Big Palangi's" 'ukulele.

Sunday, September 12, 2010

The Big Palangi's 'Ukulele

Serial #: SWWBMT02

Model #: UMCTL10

This tenor 'ukulele is being built for a good friend, Eric H. Aka: The Big Palangi, aka: The Big Easy, aka: Hazy, aka: The Big E, aka: A Big Gay Man, for a definition of "gay" please see below;

gay   /geɪ/ Show Spelled [gey] Show IPA adjective, -er, -est, noun, adverb

–adjective

1. having or showing a merry, lively mood: gay spirits; gay music.

2. bright or showy: gay colors; gay ornaments.

3. given to or abounding in social or other pleasures: a gay social season.

4. licentious; dissipated; wanton: The baron is a gay old rogue with an eye for the ladies.
 
The Big E is a gay old rogue with an eye for the ladies alright, hopefully with this new custom hand built 'uke, he'll be able to show his gayness to every lady or person who is fortunate enough to meet this extravagant fellow with a big heart.
 
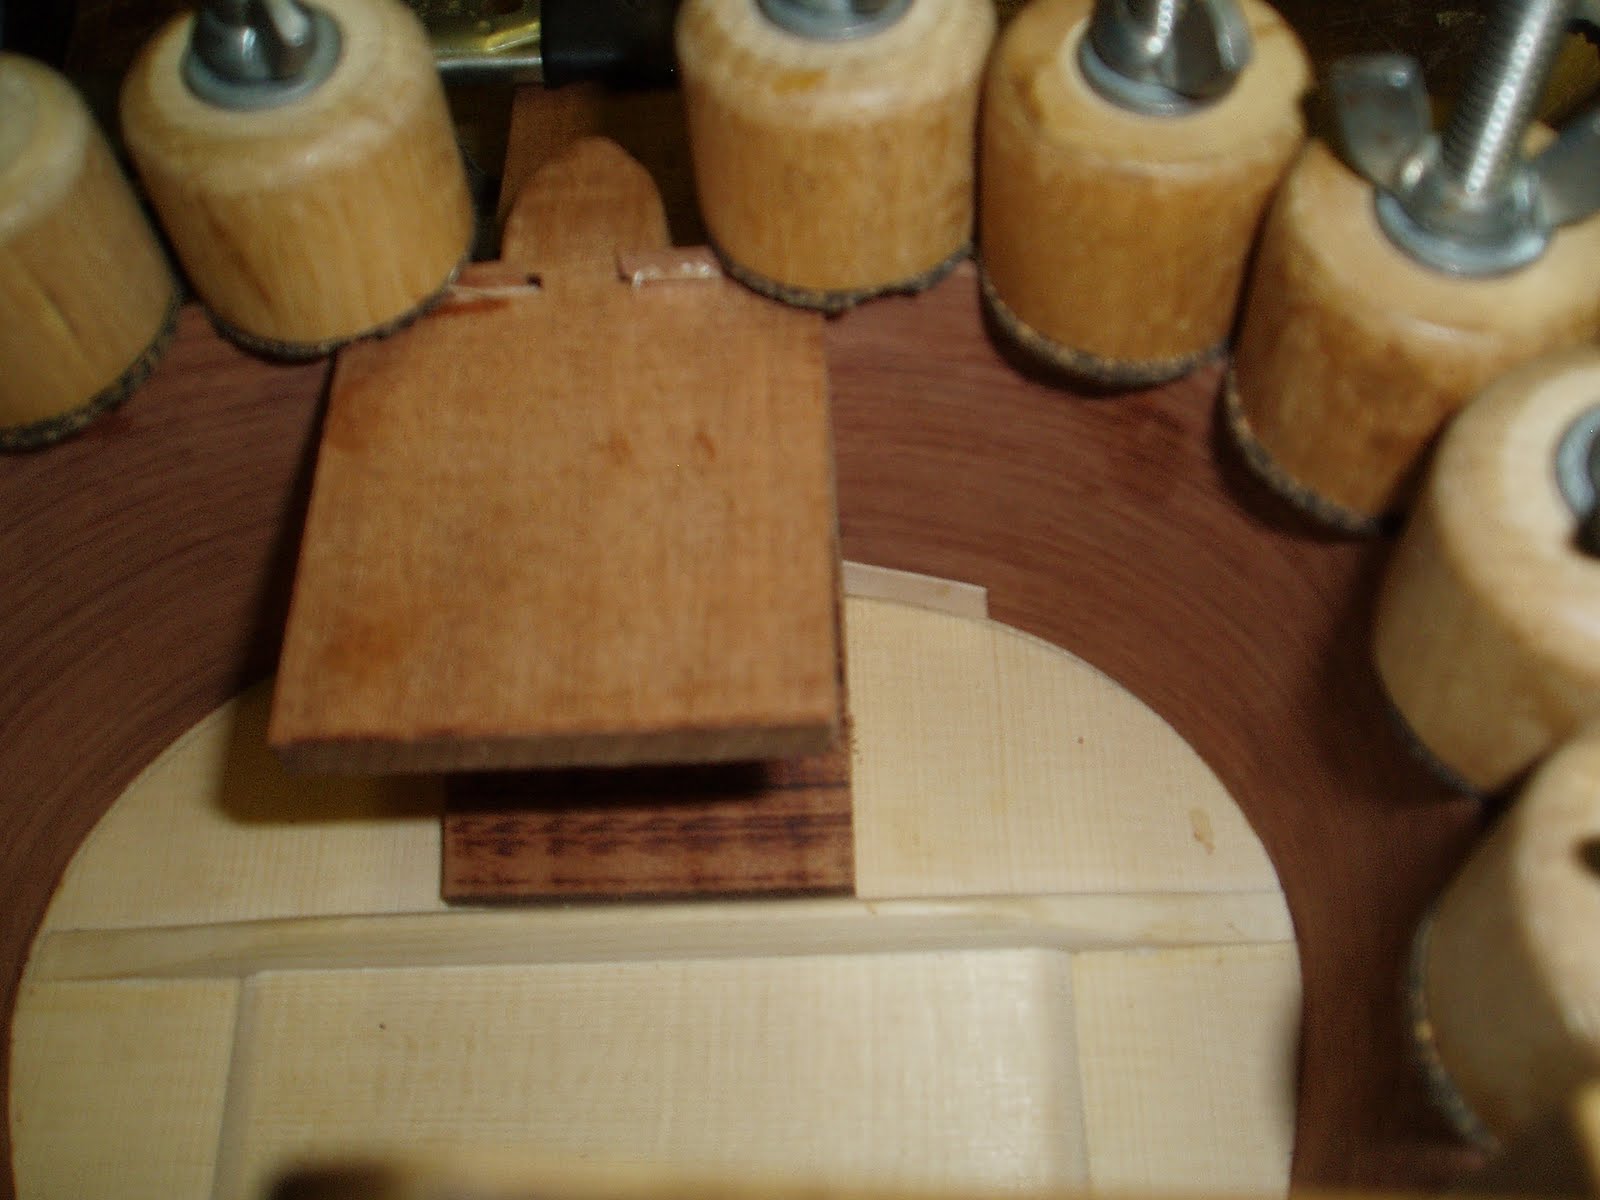
Here is a picture of it's humble beginnings.
 
Engelmann Spruce sound board, Black Walnut sides and back, Mohagany neck, and Bubinga Rosewood fretboard.

There will be updates at different stages of this tenor 'ukulele being built so please check back for updates.

Aloha,

DTH

Friday, June 4, 2010

Next Project - 1931 Martin tenor guitar

Martin tenor guitars were built as a transition instrument for banjo players to guitar, hence, four strings instead of six.

Since this resembles a baritone 'ukulele, I will attempt to replicate this classic guitar for a good friend who is a music aficionado.


Note the serial number of this classic Martin (46088) indicating when it was built.

For more information about dating Martin guitars click here

Monday, May 31, 2010

'Ukulele complete

Model# UMCTL10
Serial# SBBBMT01

For more information about this 'ukulele, please visit http://www.dthukuleles.com/

Shape nut, shape saddle, and string up the uke

Do not glue the nut at the top of the neck or saddle into the bridge. Why? It makes changing the action of the strings easy.

Gluing the bridge

Determine your scale length and mark where you want to place your bridge with tape. Scrape off the area where the bridge is going to be glued with a razor, then glue bridge and hold with a bridge clamp. Hold for 24 hours.

Finishing with Tru-oil - Do not rush this process.


Before you add the bridge, sand the whole 'ukulele starting at 80 grit until you get your desired thickness on the soundboard. Be sure to put some pencil marks around the whole body so you know how much material you are removing. Use the following progression of sandpaper, 80, 100, 120, 150, 180 then stop at 220.

Get a damp cloth and wipe the 'ukulele and let dry. There will be little hairs that rise when it dries, sand and repeat process at least twice until you do not feel any more wood hairs after you wipe the uke with a damp cloth.

Now you can progress to 320 and even up to 400 for a smooth finishing surface. You want to make sure that with each progression of sandpaper you remove the scratches from the last sandpaper grit.

Once you reach your desired smoothness,  you are ready to add your first coat of finish.

Only apply 2 coats of oil per day. Wipe on then wipe off immediately. Repeat process until you reach your desired shine.

Sound hole and fret board

Cut your sound hole and glue on the fret board.


Trimming the soundboard and back


The uke is boxed and ready to trim.


We begin trimming the excess off the soundboard and back with a rasp and file, then finish with a router. 
When routing be careful when routing around the curved edges because the grain changes direction and you can tear out more wood then you want.

Gluing the back

First dry fit the back by placing it on top of the 'ukulele sides in the same jig used to glue the sides and tentalones, lineup the center points of the back and uke body, then clamp without gluing anything yet.

Once clamped, then uke over and mark the braces where they touch the sides. Unclamp the back then measure the thickness of the tentalones at the point where you made the mark on the back brace bars.

When clamping the back to the sides, make sure apply even pressure around the whole uke body.

Now the 'ukulele is boxed and we are ready to trim the excess off the sound board and back.

Tuesday, May 11, 2010

Tentalones

When gluing the top and bottom tentalones around the sides use small sections and make sure they are clamped tight around the curves.


Sand the edges of the tentalones so the are flexible. It will break in some spots but thats ok, as long as you can clamp them to the sides, it will help support your sides to your soundboard and backboard.
Add a spare piece of wood to make the sides level with the base of the neck. Sand the inside before attaching the back to the side. Once the back in glued on, the 'ukulele is in a "boxed" "white" stage, and the only access to sand the inside will be through the soundhole.

Monday, May 10, 2010

attaching sides


Once the sides have been dry fit into neck slot and the seam at the back is tight, make 4 wedges from left over veneers and then hinge the back with tape.


After you have set the sides into the neck slot, squeeze the shimes in between to close up any gaps, then clamp the heel block.


Clamp the sides down with spool clamps and make sure the sides are touching your template line on the sound board.