Monday, June 2, 2014

Kerfing/Tentalones for Tenor Guitar

Terminology
Kerf Linings aka: "kerfing" vs Tentalones

The use of words kerfing and tentalones are commonly used interchangeably when in fact they are technically different that serve the same purpose.

Kerf linings have a thin strip that connects the thicker material used to reinforce the side-top attachment.

Tentalones are individual pieces of material glued to reinforce the sides to the sound board.

I am use the term tentalones since I purchased them from Hana Lima 'Ia, but technically, they are kerf linings, aka: kerfing. Once I meet a few more builders, I'll figure out the preferred nomenclature.

Back to the build.........

I pull all the spool clamps off and notice that a section of the left side did not glue securely......
To progress forward, I sanding underneath the section that wasn't glued, then re-glued and clamped.

At the same time, I measured and added my tentalones/kerfing.
Here is a picture of both tenor guitars in their different states of development.

One has the kerfing clamped in and the second has the top attached to the neck and sides bent.

Next up............I will add the top kerfing, then proceed to "box up" this build by attachig the back to the sides......

Attaching the sides to soundboard

 Once the sound board is mounted to the neck, I added a tail block at the bottom of the sound board the same width as the thickness of the sides away from the template line.

 Dry fit the sides and clamp in place........

INSERT expletive (here).......

Notice the gap between the bottom of the heel and the height of the sides....


 .......it's a little much, so I made a heel extension :-)
 Shaped to match......
 ......and then continued where I left off.
 Once everything was lined up and dry fit with spool clamps, I glued the sides down.
Another view....

Next up.......Kerfing/tentalones

Tuesday, May 27, 2014

Attach the top to neck

 Before I attach the sound board to the neck, I pre-shape the heel so I don't have to worry about damaging the sides or sound board once everything is assembled.

Once the heel is shaped, I cut the top portion of the sound board that will meet the neck.

To ensure alignment, I draw a center line down both the neck and sound board, the dry fit the two together and tac two small nails to mark my position.
 The two nails prevent the sound board from shifting out of alignment when I glue the pieces together.
 Clamp it up......
 Make sure I am centered..... Done.
 Next, I glue the tail block to the sound baord. 

Here's a pic of the tenor 'ukulele in progress as well, note the similarities :-)


Next up..... Attach the sides to the sound board and neck......

Tenor Guitar Fret Board

 This tenor guitar has a 23" scale length.

To determine the spacing between the frets and from the nut to each fret bar you have to do some math.

Who doesn't love a good math equation =)

The magic number to figure this out was derived from the Greek Philosopher/Mathematician Pythagoras and refined over the years to 17.817.

A good article to read about calculating fret positions can be found here. If you want to totally geek out, click here.

To find the fret spacing on any stringed instrument, you divide your scale length by this magic number to get your first fret position from the nut.

Next, subtract your first fret position from the nut from the total scale length, then divide by the magic number, 17.817.

Repeat until you reach the total number of frets you plan to cut. I used Excel to create this sheet and a conversion chart of decimal inches to find the closest fractional inch.

  
The first fret should be 1-9/32" from the base of the nut slot, the 12th fret should be at 11-1/2", and the 14th fret should be at 12-3/4".....

Side note: When I checked where the neck meets the body I noticed my drawing was 3/8" off, so I'll have to redraw my plans for my next tenor guitar build.

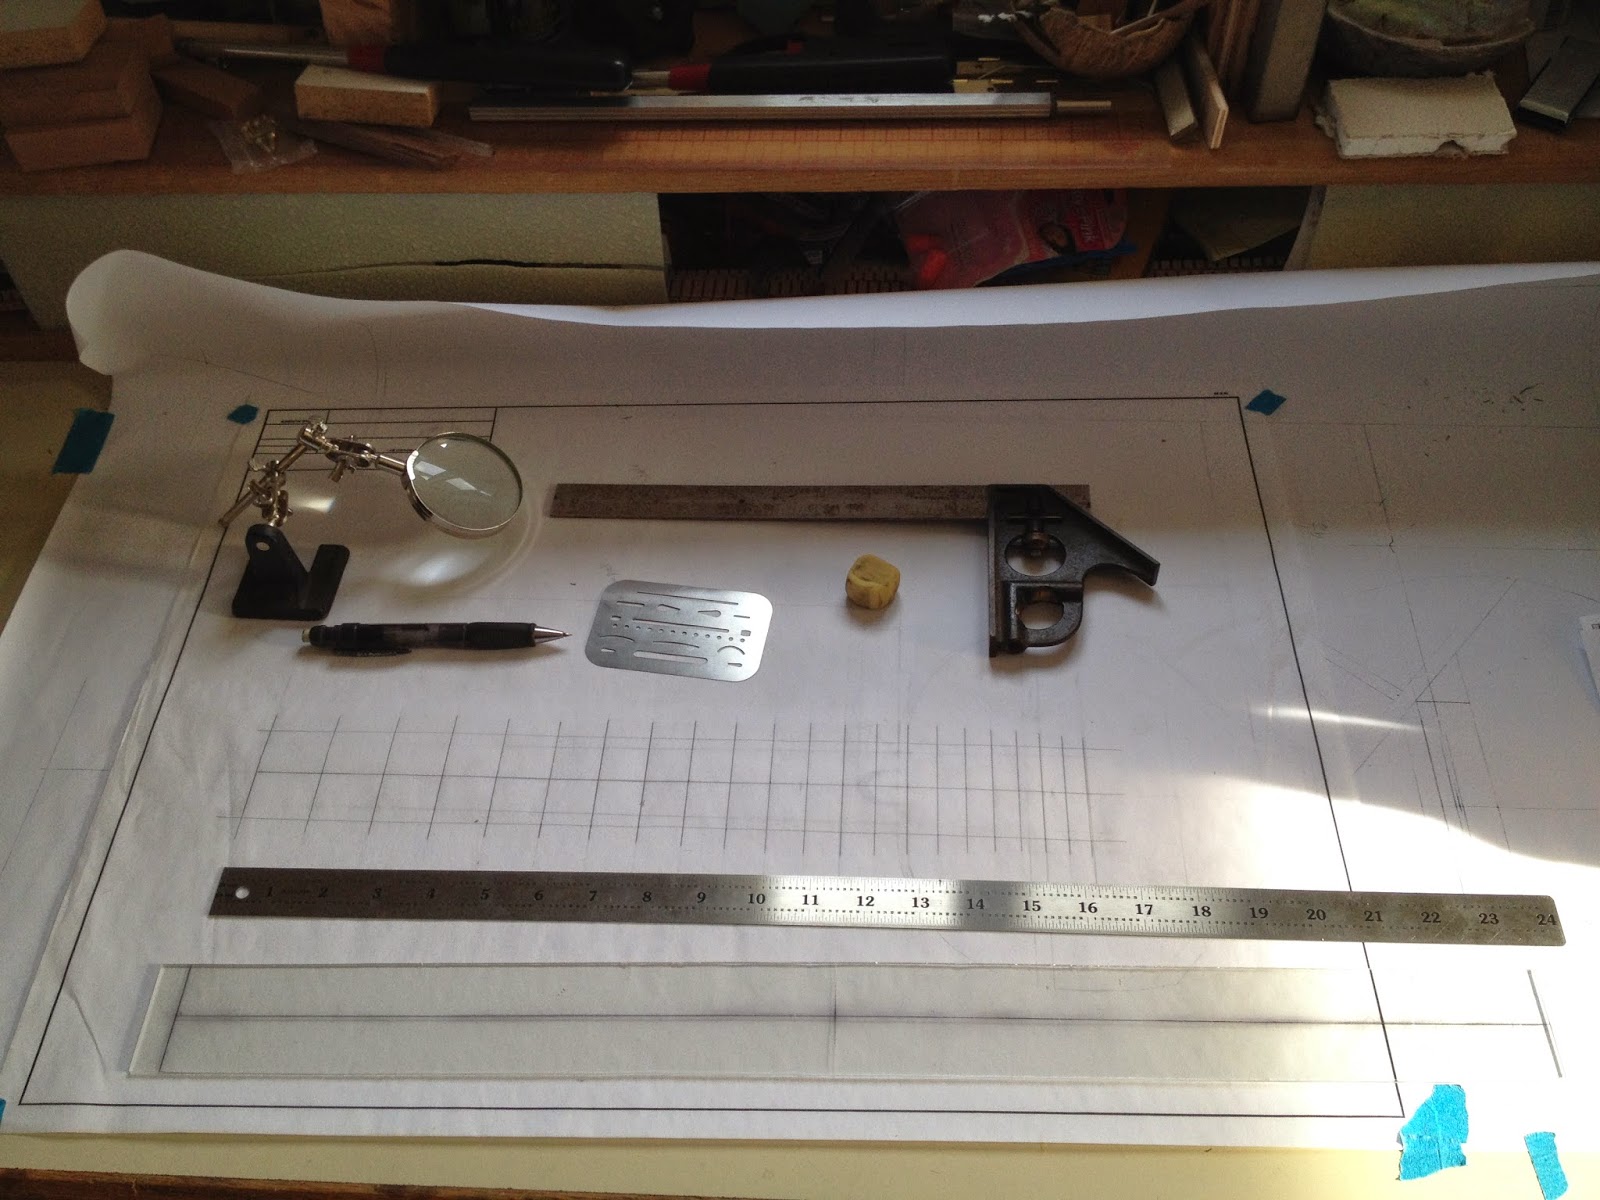
Once I drew all the lines with a straight edge and 90° square, I made a few photo copies at a local drafting shop and cut out my fret board template.

Prefab 23" fret board templates can be found at Stew Mac or LMII, but I chose to do it from scratch so I could, theoretically, reproduce any scale length going forward.

I cut out a little over 2" wide plexiglass and taped my template over the top and used scarp pieces of wood on the top and bottom so I could clamp to my work surface.
I notched the plexiglass with a hack saw and another small scrap piece to line up with my fret line. I tried to line up the saw blade with the middle of my line as close as possible.

Note: I had to re-cut this template because I cut the middle of the nut line at the top of the fret board instead of using the inner most width of nut line as the end point.

If I didn't re-cut the nut line to make a new template, I would have been 1/64th off at the 1st fret, then it would've thrown out the spacing and, most likely, the intonation across my entire fret board :(

Using a cross cut jig with a razor blade as my marker, I methodically slotted a couple fret boards using the Stew Mac fret table saw blade.
Next up..... attach top and neck...

Friday, May 23, 2014

Tenor Guitar Neck

 As mentioned earlier, this tenor guitar will have a Spanish neck joint to the body. This means that the sides will be tucked into heel slots on the side of the neck where it joins with the body of the guitar.

Read more about neck construction here.
These heel slots are cut 12-3/4" from the nut, 90° to the center line of the neck and 11/16" deep. I am left with about a 9/16" of wood in the middle of the neck.

The truss rod is 7/16" thick, so there isn't much room for error..... This is probably why a different neck joint is used with truss rods....


 The truss rod will be accessible from the sound hole for future adjustments.

Since this is a Spanish heel joint, there will be a shelf on the end of this neck block the thickness of the soundboard.

I will have to rout my truss rod channel deep enough so the soundboard will lay flat to the neck when I attach both of them together. 

This is probably another reason why other neck joints are done with truss rods.

Using a router table and a test piece, I rout a shallow channel to check for depth and alignment.

I used a 3/8" straight bit to rout the 7/16" wide channel in successive passes till I reached my desired depth. 

 Once the channel was cut, i chiseled out the shelf for my soundbaord.....
 Check if it is level....
 Drop in the truss rod and dry fit all pieces....
 Now that I have a shelf on my neck I have a gap over the truss rod to cover down the middle of the neck.

Good thing I didn't burn all my scrap wood....
note the end of my scrap wood is charred.
 Plain it to thickness....
 ....and width.....
 Check for accuracy....
 All good....

 Trim off the end...
Next, I use a heel nibbler on my table saw to rough cut the heel.... huge time saver... Thanks Hana Lima 'Ia!

 Once the heel is roughed out, I epoxied the truss rod into the channel, then glued the scrap piece in to cover the truss rod.

This should prevent any glue squeeze out that can ruin the truss rod function.
(Note to self: Next time don't use a plastic container with epoxy. I think my tray started to melt or something... the smell was kind of nauseating.)


Next up.... Fret board........