This tenor guitar side bending jig is modeled after the Fox Universal Side Bender knock off I use to bend 'ukuleles side.
First, transfer half the template pattern to 3 sheets of plywood and cut out the pattern outside the line. Then dram a second line underneath, about the thickness of your intended sides.
I stacked them all together, then used a rasp and files to fine tune to the second line under the main template line
Next, glue all pieces together with 2x4's spaced a little over the width of the heat blanket. The heating blanket can be purchased from Hana Lima or Luthiers Merchantile International
I cut out a wire mesh to wrapped around the top with finishing nails.
A second, mesh is used to sandwich the heat blanket and the sides together. The eye and hook bolts are used for clamping.
This board is cut into 3 pieces for the waist, front and back clamps.
Assembled looks like this.....
Added a few star knobs to make the clamping a little smoother.
Also, want to point out the stick at the bottom is used for clamping this jig to my work surface.
Next up, we bend........
Tuesday, May 20, 2014
Thursday, May 15, 2014
Tenor Guitar Side Molding Jig
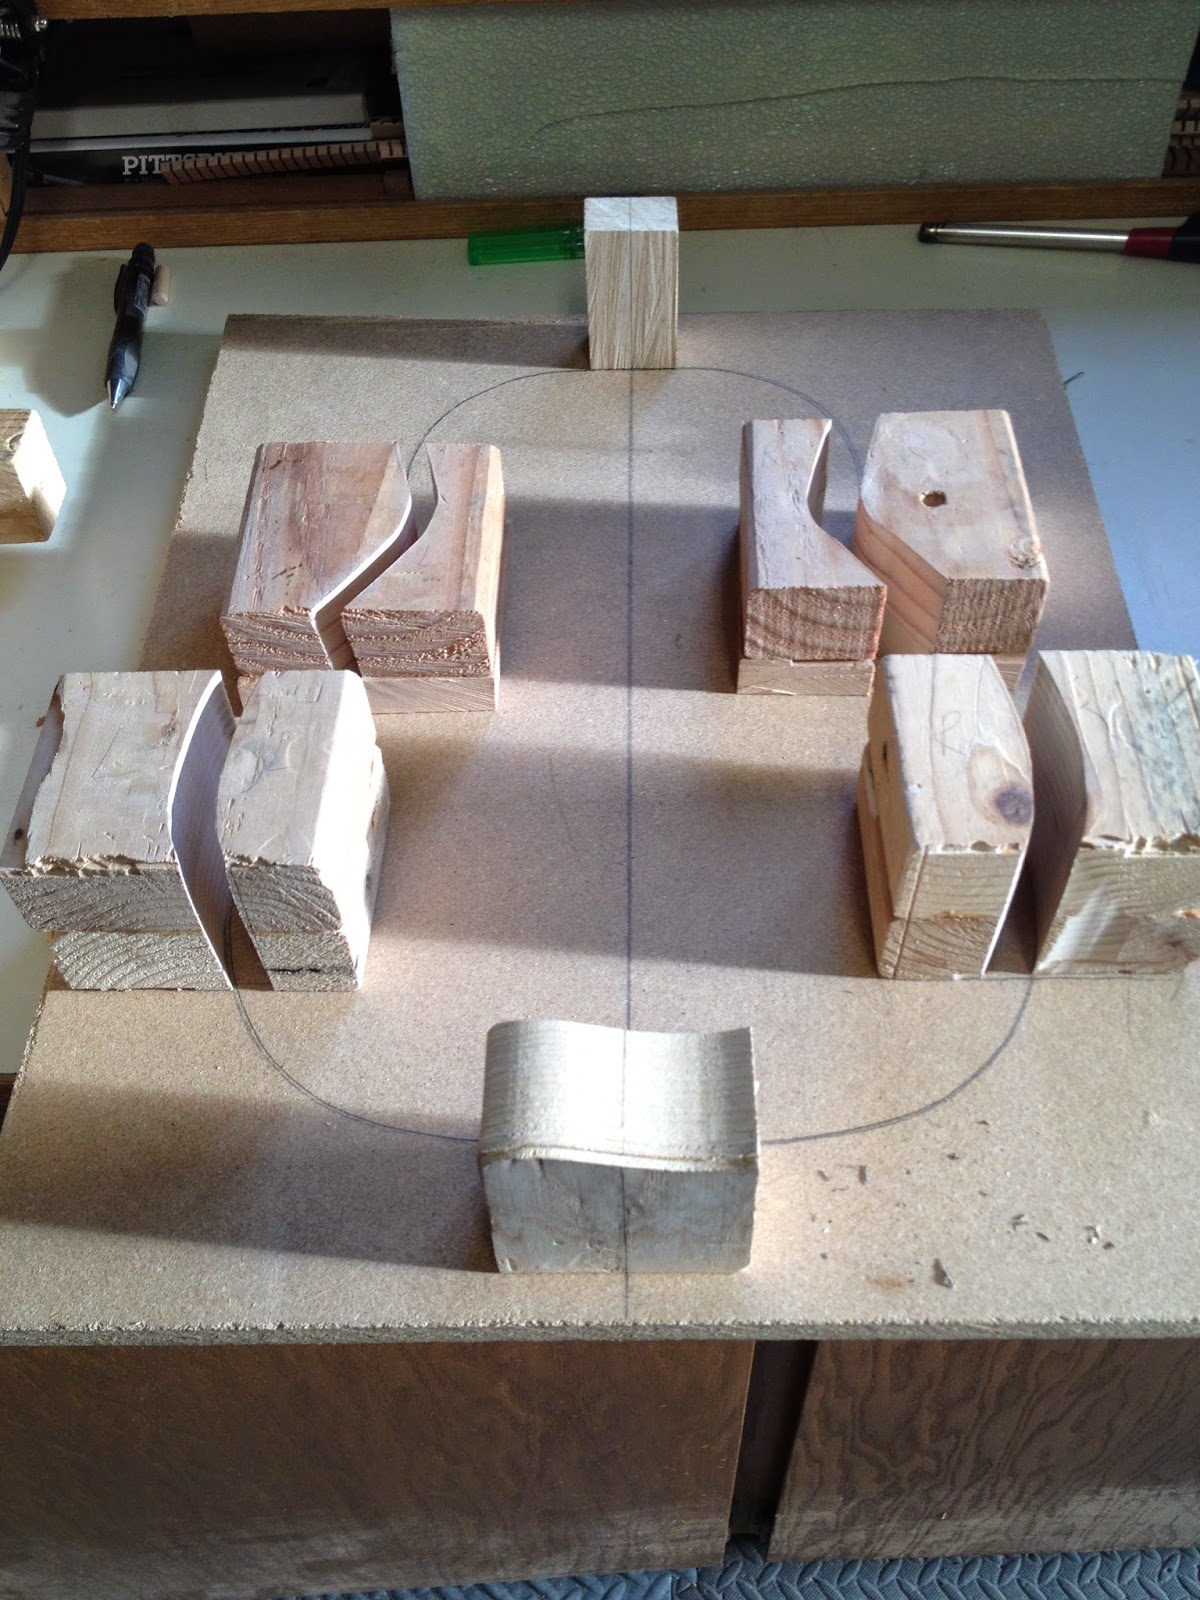
Here is my attempt to recreate a side mold jig I used for 'ukulele construction and scaled to a tenor guitar size.
Draw template outline and glue end blocks.
Rough out a few 2x4's and lay across pattern to transfer the outline to the blocks. Mark the bottom where the line touches the block, then use a square and draw a line up the side. Lay your template where the lines meet at the top of the block.
Cut along the line you just transferred with your template and you should have something that looks like the next picture...
Once this cut is roughed out, clean up with a file and rasp so you have 90° edges.
Next step is to add some all thread, washers and nuts to act as spreaders that clamp and expand the sides.
After this is down, I'll work on the side bending mold.....
Draw template outline and glue end blocks.
Rough out a few 2x4's and lay across pattern to transfer the outline to the blocks. Mark the bottom where the line touches the block, then use a square and draw a line up the side. Lay your template where the lines meet at the top of the block.
Cut along the line you just transferred with your template and you should have something that looks like the next picture...
Once this cut is roughed out, clean up with a file and rasp so you have 90° edges.
Next step is to add some all thread, washers and nuts to act as spreaders that clamp and expand the sides.
After this is down, I'll work on the side bending mold.....
Wednesday, May 7, 2014
Next project - Reproduce a 1931 Martin tenor guitar
About the Martin Tenor Guitar project.
Model# 5-17T
Serial # 46088
How to date this Martin guitar? - Visit this link
(Flashback) After taking an 'ukulele building class at the Hana Lima 'Ia School in Honolulu, HI, a buddy of mine asked if I could reproduce his fathers Martin Tenor Guitar. He said it played like a dream and thought, "hey, can you build me one?"
As a novice builder stoked to try anything I said, "Yeah sure, I can do that, no problem."
Having limited knowledge about materials, tools, time, or intricacies of
building instruments, I took some measurements and started my
journey...
That was 4 years ago (2010) and I am now in the midst of attempting to reproduce one of the most legendary brands in the history of guitar making with the skills I've picked up after building 8 'ukuleles. Sound, look and feel are subjective, so I'll document this process to better understand my progression in this craft of Luthiere.
As noted above, the model number is 5-17T
That was 4 years ago (2010) and I am now in the midst of attempting to reproduce one of the most legendary brands in the history of guitar making with the skills I've picked up after building 8 'ukuleles. Sound, look and feel are subjective, so I'll document this process to better understand my progression in this craft of Luthiere.
As noted above, the model number is 5-17T
5 - represents the body style
17 - represents that it is an all Mahogany instrument.
T - represents that it is a tenor guitar
For reference, click here
Not going for an exact replica, but this repro is all Philippine Mahogany (not true Mohog, but sampling for this demo); top, back, sides, and neck. Second Tenor G, will be made with African Mahogany. Fretboard and bridge will be made of Granadillo and the second TG will be made with Honduran Rosewood, and the nut and saddle will be made of bone with buffalo bridge pins.
Scalloped "Golden Era" forward shifted X-bracing (braces were split from an old growth Redwood 2x4) and Gotoh friction tuners. Rosette is a five layered string inlay of black and white Maple from Luthiers Merchantile International, Inc.
Here are some pics and will post more as I continue the build........
Step 1 - Design
Choose and resaw my stock.
Join and rough cut shape for top and back...
Start the rosette with a circle cutting jig, 1/8" chisel, and some patience =)
Split the braces.....
Match up the bracing to the pattern, shape, then glue with a Go Deck and Go Bars.
Starting the sides and neck ....... Interlude........
References:
'Uke jigs
Jointing jig, circle jig, 15° neck scarf joint jig, and 90° fence
3° Heel slot jig, side taper jig, side clamping jig, and side holding mold
These tenor 'ukulele jigs were built to accommodate my power tools, so any jigs made by another builder would vary based on their own creativity and available materials.
Wednesday, November 13, 2013
Subscribe to:
Posts (Atom)